Split testing YouTube thumbnails is the key to YouTube CTR success! And CTR (click-through rate) is a critical component of the success of your YouTube channel. CTR is the percentage of impressions (a user seeing your thumbnail and title) that became viewers.
If your video has a low click-through rate, YouTube will begin to categorize your content as misleading or low quality, which will lead to fewer and fewer suggestions.
The thumbnail is the first interaction a user has with your content, which means compelling visuals and copy tailored for your target audience will entice them to watch your video! On the flip side, if your thumbnail doesn’t hit a user’s pain points and desires, you’re missing out on an opportunity to provide value to that individual (and more like them). The same is true if your underwhelming thumbnail gets lost in a sea of interesting visuals.
In this blog post, we’ll uncover the power of split testing YouTube thumbnails and its impact on boosting your channel’s CTR. Let’s dive in!
🎯 Need help with thumbnail split testing? Our video marketing agency has the expertise to make your videos stand out. Find out how we can enhance your CTR!”
How to split test youTube thumbnails
Creating your YouTube thumbnail
Before we get into the split testing, there are a few high level things to keep in mind when creating your YouTube thumbnails. Keep these in mind when you’re creating your thumbnails for testing.
- Make sure your thumbnail aligns with the message of your video.
- While views are nice to see, if a user doesn’t stick around to watch your video (due to click-bait or otherwise), YouTube will consider your video to be lower in quality.
- The goal is to attract your audience to increase viewer retention and watch time.
- A custom thumbnail is mandatory, but in the next section, we’ll talk about why split testing makes it much easier to see which elements are driving clicks to your video.
Btw, for some extra tips and motivation on YouTube thumbnails and CTR, check out our YouTube CTR blog post.

What is split testing?
Split testing is the process of comparing the performance of two or more versions of an asset and seeing what resonates most with your audience over time. For YouTube, this means switching between thumbnail or meta-data variants every 24 hours to collect data on the effectiveness each day.
These tests can be run for a specified period of time, usually 14 days. Some choose to stop experimenting once they’ve received clear results of statistical significance.
We can use metrics like CTR and view duration to give us insight into which thumbnails are converting clicks into views, and whether they stuck around to watch the full video. Though you can see metrics like views, we recommend you always focus on the variant with a higher CTR rather than view count. (Higher CTR = higher potential for more viewers overall in the long run.)
How to design thumbnail variants for maximum results
Creating diverse thumbnail variants is key to run a proper test and gain valuable insights and results. We strongly believe in the ABT principle (Always Be Testing). Beyond our recommendations below, continuous testing is always smart. Let’s delve into some design methods to consider:”
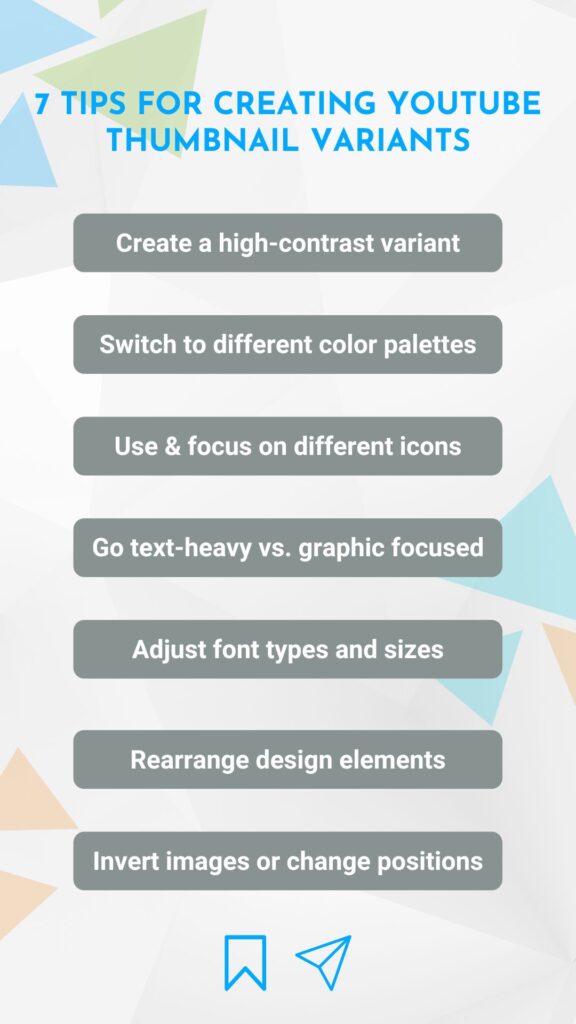
Let’s unpack those a bit further:
- Create a high-contrast variant: A striking contrast can make your thumbnail stand out, grabbing viewers' attention amidst a sea of content.
- Switch to different color palettes: Exploring a variety of color schemes can evoke different emotions or reactions from your audience.
- Use and focus on different icons: Highlighting unique icons can provide quick visual cues, helping viewers instantly recognize the content's theme or subject.
- Go text-heavy vs. graphic focused: Balancing between a text-centric and a graphics-centric thumbnail lets you test the effectiveness of each.
- Adjust font types and sizes: Altering fonts can change the mood or emphasis of your thumbnail, guiding viewers' attention to specific parts of your content.
- Rearrange design elements: Shifting elements around can lead to a fresher perspective, potentially making the thumbnail more engaging or informative.
- Invert images or change positions: Flipping or repositioning images can add dynamism and intrigue, prompting viewers to take a second look or click on your content.
Use this opportunity to experiment with new styles altogether, and play with changes in tone to see what’s working. Don’t be too cautious… it’s just a test after all. In fact, stepping out of your “design comfort zone” is one of the best ways to figure out what your audience actually wants.
🌟 Make your ads unforgettable with compelling thumbnails. With our YouTube advertising services, we’ll help you split-test to success. Learn more about our services!
Using TubeBuddy to perform YouTube thumbnail Split testing
TubeBuddy is a browser extension that equips you with resources for YouTube success! It’s a fantastic tool for things like keyword research and generating content ideas, and their Legendary plan also includes its own set of detailed analytics.
Our favorite tool of theirs is Split Testing. TubeBuddy provides options to split test both thumbnails and metadata, but today we’re focusing on thumbnails. Here’s how to setup a Thumbnail Split test with TubeBuddy:
Step 1
From your YouTube Studio, you can click the TubeBuddy icon to open the menu and select Split testing.
Step 2
Start a new test, and select the video on which you want to run a split test.
Step 3
Select Thumbnail CTR Test and choose how many days to run the test for. Your test won’t begin until Midnight, regardless of when you set up the test.
Step 4
You can decide whether you want to let the test run in its entirety, or if you want to run it until TubeBuddy considers a variation to have hit statistical significance.
Step 5
The default is “Start Test ASAP”, and it will automatically select an appropriate time zone. You can choose to schedule this if you’re not satisfied.
Step 6
The original thumbnail will automatically be set, so now you can upload the test thumbnail.
Step 7
Click “Start Test”, and then “yes start test” to finish your preparations.
Just like that, you’re split testing YouTube thumbnails! Now you just need to wait for the results to roll in.
If you’re interested in signing up for TubeBuddy to take advantage of their incredible tools, head to their website and use code “VireoBuddy” for 20% off!
What to do when your Split test is finished
Once your test is finished, visit the TubeBuddy homepage to check out your results. You’ll see which thumbnail performed better, along with a wide range of metrics compared between each variant. These include impressions, watch time, views, view duration, traffic sources, likes, and comments. The more tests you do, the more clear and consistent this data will become.
Remember to isolate certain elements to compare and confirm your thoughts. Make sure to set the winning variant as the thumbnail for your video so you can take advantage of your new found insights!
Conclusion
Split testing can have an incredibly positive effect on not only the performance of your videos, but also on your ability to understand your audience better. This strategy is worth your time and effort. Give it a go!
As always, if you’re looking for even more ways to build success on YouTube, we are always just a click away. Book a consultation with Vireo Video to see what we can do for you!


